Order Entry
Streamline billing with customer billing groups
Billing groups introduce a new way to streamline billing for customers with similar invoicing needs. With billing groups, you can group customers, apply common charges, and automate invoice generation all in one place. This reduces manual work and helps ensure consistent, accurate billing across customers.
Key benefits
-
Centralize and scale billing: Group customers with similar billing preferences and manage shared billing cycles.
-
Configure charges once: Set up recurring or one‑time charges and apply them consistently across all group members.
-
Automate recurring invoices: Generate invoices automatically on a set schedule, reducing manual effort and improving consistency.
-
Eliminate manual workarounds: Replace repetitive invoice setup, external spreadsheets, and multi‑step processes with a streamlined workflow.
How it works
Step 1. Create a billing group
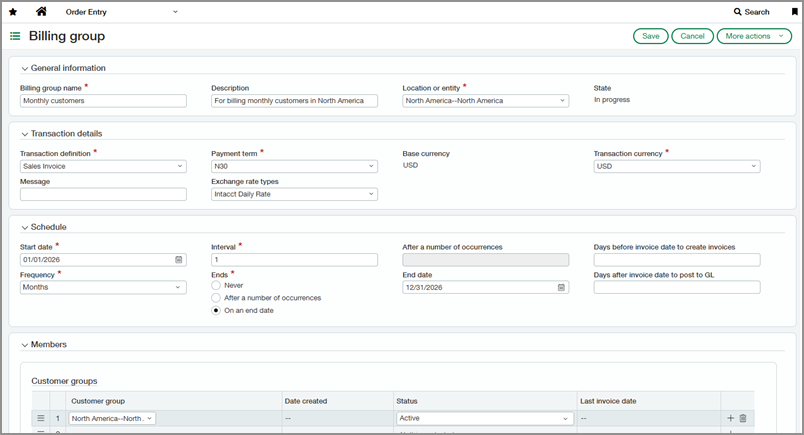
-
Go to Order Entry > Setup > More and select Add (circle) next to Billing groups.
-
Specify transaction details.
Choose the transaction definition, payment term, and transaction currency to use for invoices generated from this group.
-
Define the billing schedule.
Select the start date, frequency, interval, and whether you want the schedule to end. For example, choose Months with an Interval of 3 to invoice every three months.
-
Assign group members.
Add individual customers or assign customer groups.
You can keep membership updated automatically by creating a customer group with filters. To manage customer groups, go to Reports > Setup > Dimension groups > Customer. -
Select Save.
Step 2. Add charges to the group
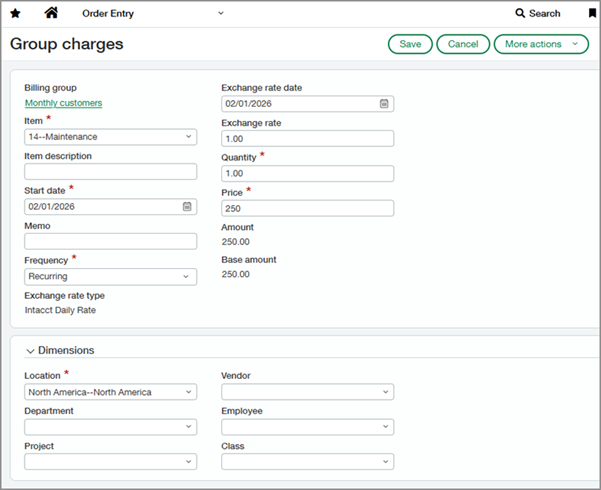
-
Go to Order Entry > Setup > More > Billing groups.
-
Select Edit next to the billing group that you created.
-
Select the Group charges tab.
-
Select Add.
-
Define the item to bill for, when to start including it on invoices, and pricing details.
-
Select a frequency.
-
Recurring charges are included in every invoice run.
-
One-time charges are included in the first invoice run after their start date.
-
Step 3. Generate invoices
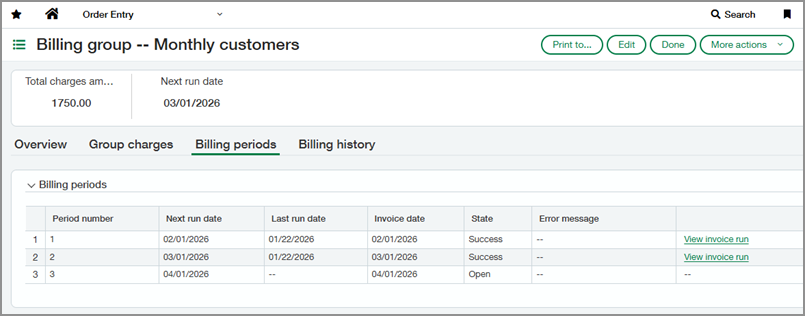
Invoices are generated automatically based on the billing group's schedule.
You can also initiate a run manually by going to More actions > Start invoice run on the billing group. This action processes the next scheduled billing period and reruns the last unsuccessful period (if any).
To view past invoice runs and their status, go to the Billing periods tab of the billing group. This tab also shows the next scheduled billing period.
Step 4. Review invoices
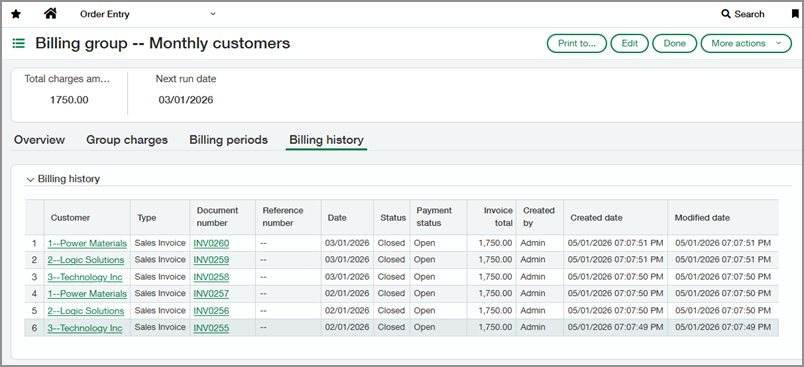
Go to the billing group's Billing history tab to view all invoices generated from the group.
Permissions and other requirements
| Subscription |
Order Entry |
|---|---|
| Regional availability |
|
| User type |
Business |
| Permissions |
Order Entry
|
| Restrictions |
|